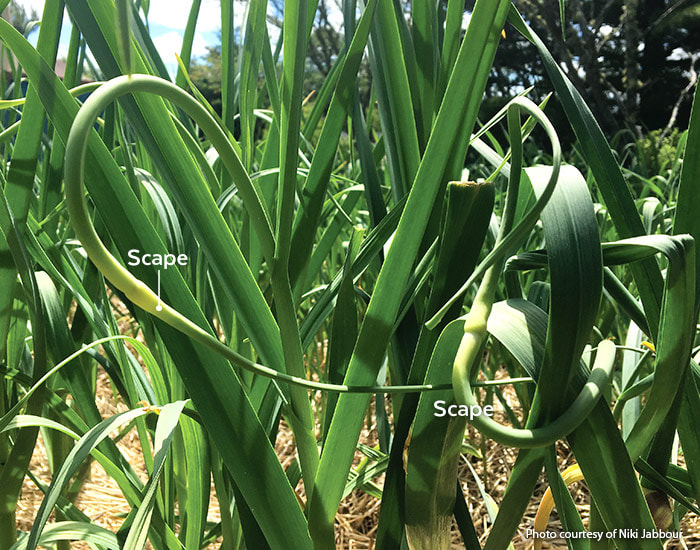
by Judy Kautz, OSU Extension Master GardenerThere are many reasons to grow your own garlic. First, it’s really easy to do. It is a good idea for new vegetable gardeners to include a patch of garlic. The plants are bothered by few pests and diseases; even the deer and rabbits that nibble on other crops rarely venture into the garlic patch. It’s also extremely low maintenance, requiring little fussing during the growing season. The best reason to plant garlic, however, is flavor. Home grown cloves are packed with a depth of flavor that you’ll never find with supermarket varieties. Garlic plants are bothered by few pests and diseases; even the deer and rabbits that nibble on other crops rarely venture into the garlic patch. And while garlic cloves can technically be planted in early spring, autumn is the best time to plant if you want really big bulbs. Time your planting for about four to six weeks before the ground is expected to freeze (traditionally around Halloween). This gives the cloves time to set roots before the arrival of winter. Niki Jabbour of Garden Gate magazine gives us an excellent summary on growing garlic. For big bulbs, garlic is best planted in autumn, about four to six weeks before the first expected frost. Break apart the cloves and sort them - the biggest for planting and the rest for the kitchen. Garlic can be grown almost anywhere in North America, from USDA zone 2 and warmer, although certain varieties do better in very cold regions. There are two main types of garlic: hardneck and softneck. Hardneck garlic produces a long flowering stalk, called a “scape,” in early summer. Beneath the soil, a single row of cloves develops around this central stalk. Hardneck garlic produces fewer cloves per bulb than softneck varieties, but each individual clove is larger, and many believe it to be more flavorful. Hardneck types are also usually more winter hardy than softneck garlic and are therefore the garlic of choice for short-season gardeners. Once harvested and cured, hardneck garlic stores for up to six months. Clip hardneck garlic scapes when they look like this to get bigger garlic bulbs. Softneck garlic is not usually as winter hardy as hardneck garlic and is often grown in milder regions. The bulbs are packed with cloves — sometimes more than 20 in a bulb! — that range in size from small to large. They do not produce a central scape, but instead have soft, flexible stems and leaves. This is why you’ll sometimes see softneck garlic braided for storage. And speaking of storage, softneck garlic stores very well, with the cloves remaining firm and flavorful for up to a year.
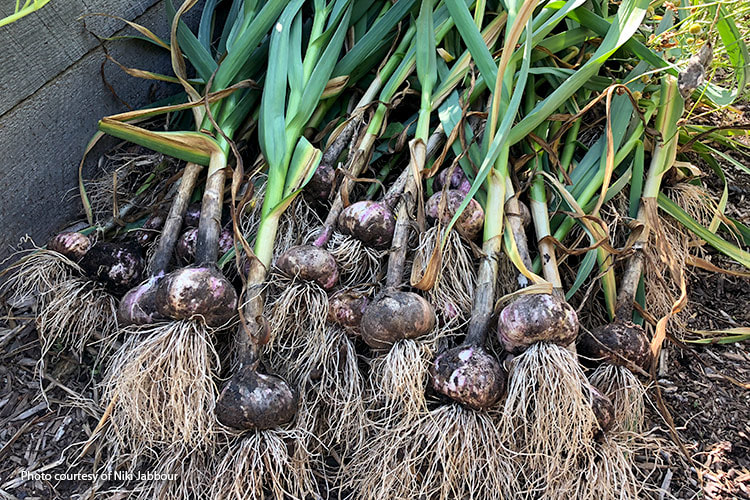
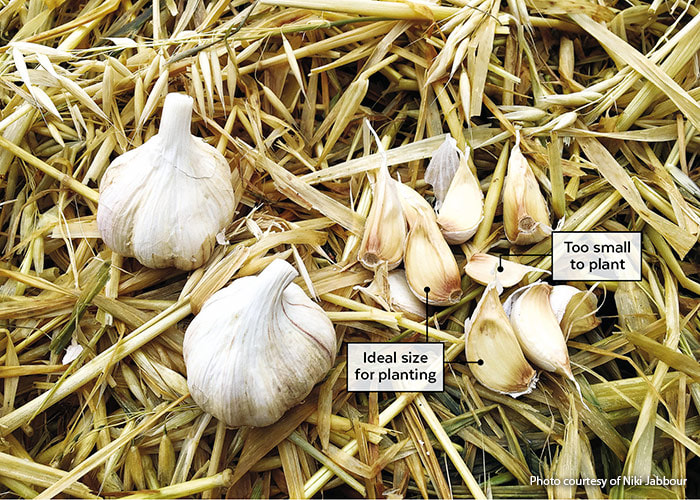
Where do you buy garlic for planting? There are three places to buy garlic for planting: your local garden center, the farmers market or an online catalog. Don’t buy garlic from the supermarket, as it may not be the right type for our climate and could also have been treated with a sprout inhibitor. If buying garlic locally, choose plump bulbs with no brown spots or mold. As long as bulbs were grown locally, any you buy at the farmers market will be fine in your garden. When choosing garlic to grow, don’t be shy about trying different varieties. There are hundreds of hardneck garlic varieties and dozens of softneck ones available to gardeners. While all taste like garlic, there are subtle flavor and pungency differences between types and varieties. How do you grow your own garlic? Garlic grows best in a site with at least six hours of sun each day. It also needs well-draining soil. Before planting, loosen the soil and dig in 1 to 2 inches of compost or aged manure to improve the soil. Once the garden is prepped, gently break the bulbs into individual cloves. Separate varieties into different containers. Don’t plant naked cloves! Leave the papery covering intact when you plant as it protects the cloves from potentially damaging microbes. Does clove size matter? The smallest cloves won’t size up into large bulbs. Set these aside to be taken to the kitchen. Also take a close look at the largest cloves: Sometimes you can see that they’ve split in two within their papery husk. If planted, they’ll form two side-by-side plants and this can result in stunted bulbs. So also toss large split cloves into the kitchen basket. Plant garlic in a grid pattern, spacing the cloves 6 inches apart and planting them 2 to 3 inches deep. After the bed has been planted, water well and top dress with a slow-release organic bulb fertilizer. Then mulch the soil with a 3-inch-deep layer of shredded leaves or straw. This reduces weed growth and insulates the bed for winter. Caring for your garlic should include feeding. As the weather warms in spring, you’ll notice green garlic shoots emerging from the mulch. At this point, apply a balanced granular organic fertilizer. Garlic appreciates a steady supply of nutrients, and feeding the plants results in bigger bulbs. This initial feeding can be followed up with an application of a liquid organic fertilizer, such as fish emulsion, when the garlic scapes are removed (on hardneck types) in mid- to late spring. With regard to watering, if there has been no rain, deep water the bed once a week with 1 to 2 inches of water. You can use a watering wand to hand water or snake a soaker hose through your garlic patch. While garlic growing problems are rare, keep an eye out for white rot, a fungal disease that affects onions and garlic. The first sign is yellowing leaves or stunted growth with the bulbs failing to develop well. Crop rotation and buying disease-free planting stock are the best way to avoid white rot. No matter if you’re growing softneck or hardneck garlic, it’s time to harvest when half of the leaves have yellowed. Use a garden fork to loosen the soil and gently lift the bulbs. This reduces damage, which could shorten storage life. Brush off soil clumps clinging to the roots with your gloves. Before you store homegrown garlic, it needs to cure. Curing helps develop the flavor and prepare the bulbs for long-term storage. Here’s how to do it: Hang the plants, with the foliage still attached, in a room, shed or site that is out of direct sunlight, sheltered from rain, and well ventilated. A temperature in the range of 75 to 80 degrees F is ideal. If you have a laundry rack, use it to hang the bulbs. You can also lay them flat on a mesh screen or newspapers, flipping them over every day or two so they cure evenly for two weeks. After they’ve cured, clean the bulbs by trimming the leaves and roots. I leave a 2-inch stem and trim the roots to about 1 inch. I also remove the outer wrapper if it’s very dirty. Place the bulbs in a single layer in a box, basket or hang in mesh bags. Store garlic in a cool, well-ventilated room that is 60 to 65 degrees F. A dry basement is ideal, but you can also keep it in a pantry or storage room. If you don’t have a good spot to store garlic, you can freeze peeled cloves on a parchment-lined tray. Once they’re frozen, bag them up and store in the freezer. Given its essential status in the kitchen, every garden needs a patch of garlic. It’s easy to grow, reliable and delicious. No space for a veggie garden? Tuck garlic cloves in ornamental beds, where the pungent aroma of the plants may even chase away insects and critters. Give garlic a try!
0 Comments
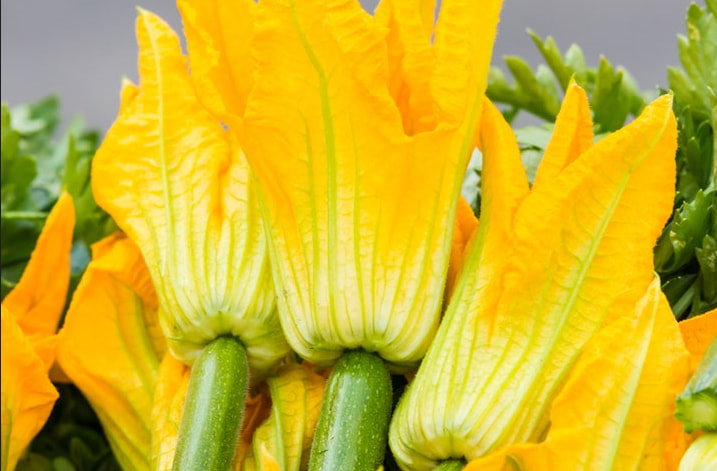
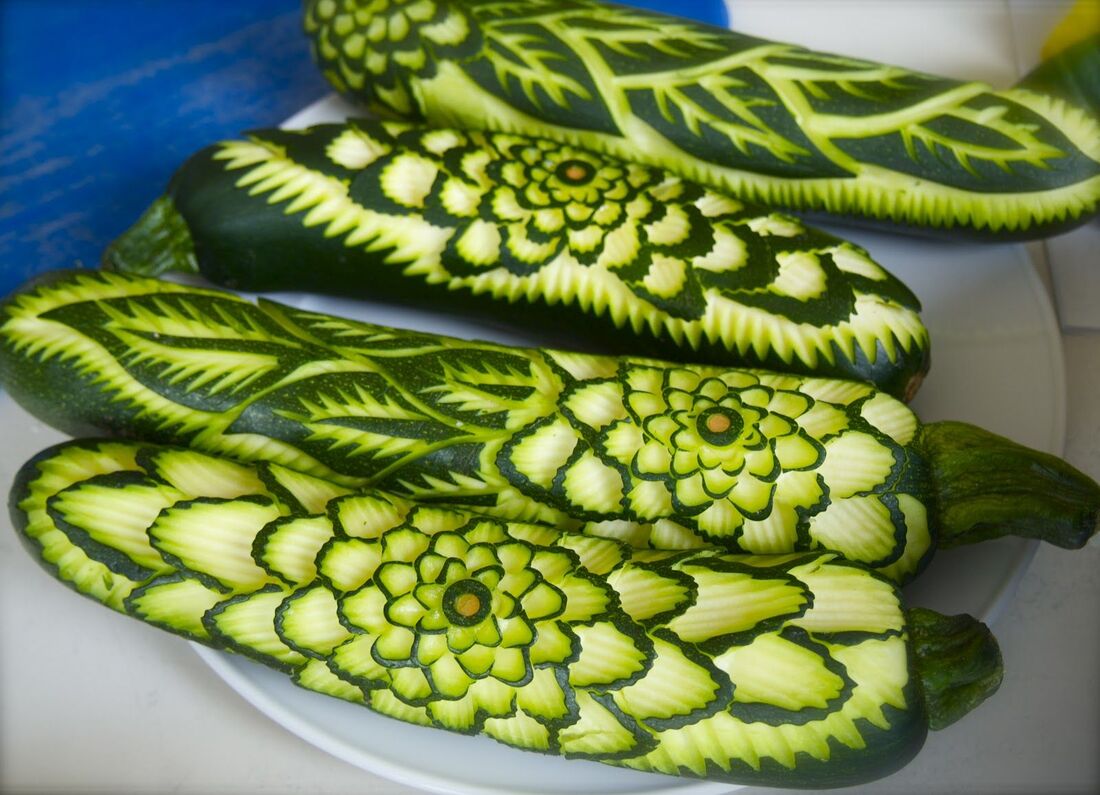
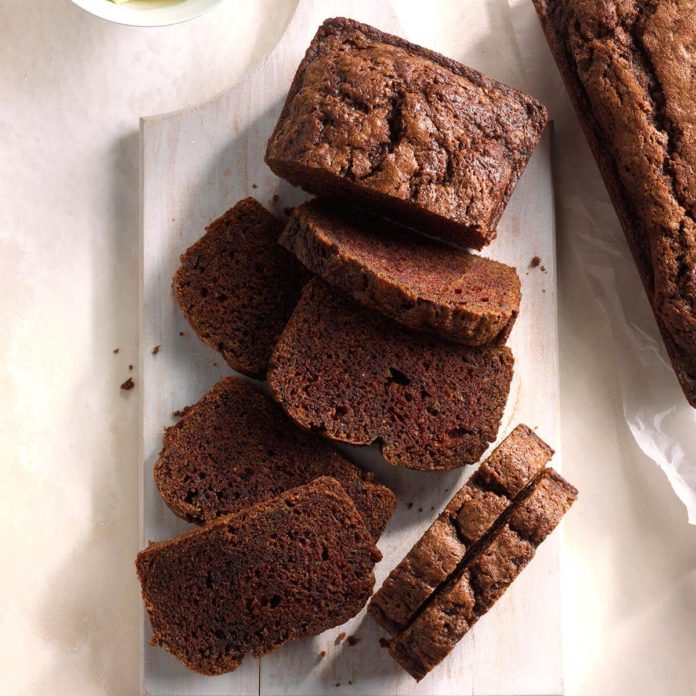
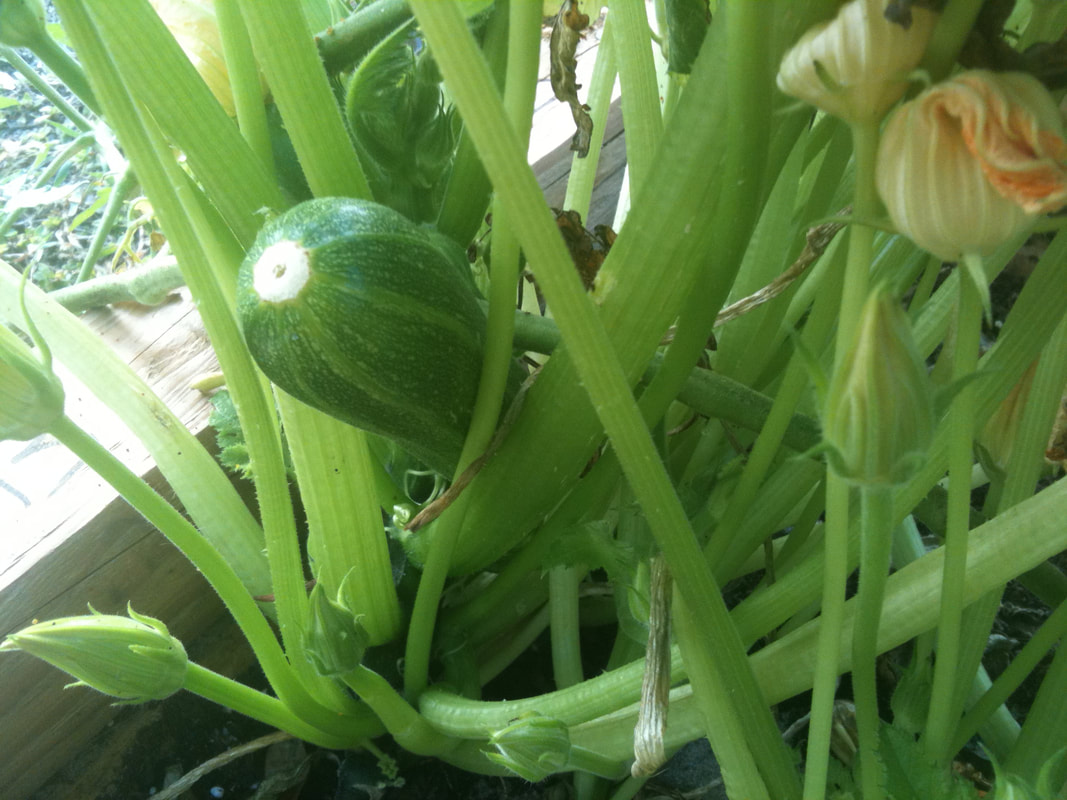
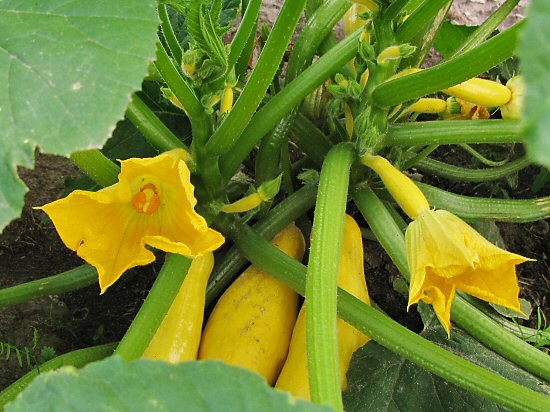
by Judy Kautz, OSU Extension Master GardenerAre you overrun by zucchini this summer? Slice it, grill it, fill it, fry it, bake it, pickle it, grate it, turn it into zoodles – zucchini is the most versatile vegetable in the garden. Desperation may have something to do with all those variations, because the more you pick, the more the plant produces. And there is usually one that gets away, hiding under leaves and reaching an enormous size! Zucchini is originally native to Mexico, but the squash we know today is a variety brought to the United States by Italian immigrants. The early varieties, bred in Italy in the 16th century, were round. They were dubbed zucchini from Zucca, meaning pumpkin, and ini, which means small. The elongated version we know, grow and love was developed near Milan. The squash was used here but really took off in the early 1970s with the age of flower children and their focus on home gardens and vegetarianism. Soon, zukes began popping up in seed collections - Burpee, for example in 1973 - and on grocery store counters. Zucchini cookbooks abounded shortly after, because this veggie is generous to a fault! You can slow down the production by eating the female flowers, identified by a tiny zuke at the base of the blossom, stuffed with cheese or meat and immersed in sauce or fried. Female zucchini blossoms can be stuffed with cheese or meat and fried! What can you do with all the bounty of zucchini? Eat it, donate it to a food bank, feed it to backyard chickens and rabbits…or have fun with it. Maybe you should hold a neighborhood contest for the biggest zucchini and share a potluck of zucchini dishes. Or you can use pumpkin-carving tools to make designs in the outer skin for a centerpiece. Bat a whiffle ball with the giant ones, and then save and dry the mature seeds for the cardinals at your feeders. When all else fails, celebrate April fool’s day in August: play a joke on a friend or neighbor by sneaking into their garden and placing your overgrown zucchini among their plants. Or offload your extras on the doorstep of a friend or neighbor in the dark of night like the Tooth Fairy – surprise…it’s a giant zuke! All’s fair when it comes to zucchini! Pumpkin-carving tools work well for carving zucchini into a table centerpiece. All kidding aside, if you have an excess of zucchini, shred it and freeze so it will be available all winter long. A good use for this shredded zucchini is in a yummy chocolate zucchini bread. This recipe takes just 15 minutes to prepare and bakes in about 50 minutes. It makes two loaves of 12 slides each. Here are the ingredients: 2 cups sugar, 1 cup canola oil, 3 large eggs, 1 tablespoon vanilla extract, 2-1/2 cups all-purpose flour, ½ cup baking cocoa, 1 teaspoon salt, 1 teaspoon baking soda, 1 teaspoon ground cinnamon, ¼ teaspoon baking powder, 2 cups shredded, peeled zucchini, 1 cup chopped nuts (optional). Directions: In a large bowl, beat sugar, oil, eggs and vanilla until well blended. Combine flour, cocoa, salt, baking soda, cinnamon and baking powder; gradually beat into sugar mixture until blended. Stir in zucchini and nuts. Transfer to two 8x4 inch loaf pans coated with cooking spray. Bake at 350 degrees for 50 – 55 minutes or until a toothpick inserted in the center comes out clean. Cool for 10 minutes before removing from pans to wire racks to cool completely. Chocolate zucchini bread is a tasty treat and a great way to use excess zucchini. Here is another low-calorie recipe for Zucchini Tots. Here are the ingredients: 1 cup zucchini, grated, 1 large egg, 1/4 medium onion, diced, 1/4 cup reduced sharp cheddar cheese, grated, 1/2 cup seasoned breadcrumbs salt & pepper to taste, cooking spray. Directions: Preheat oven to 400 degrees. Spray mini muffin tin with cooking spray. Grate zucchini into a clean dish towel. Wring all of the excess water out of the zucchini. In a medium bowl, combine all of the ingredients and season with salt & pepper to taste. Fill each muffin section to the top, pushing down on the filling with your spoon so it's nice and compacted so they don't fall apart when you take them out of the tin. Bake for 16 to 18 minutes or until the tops are golden. Use a plastic knife or rubber spatula around the edges of each tot to remove them from the muffin tin. Enjoy!
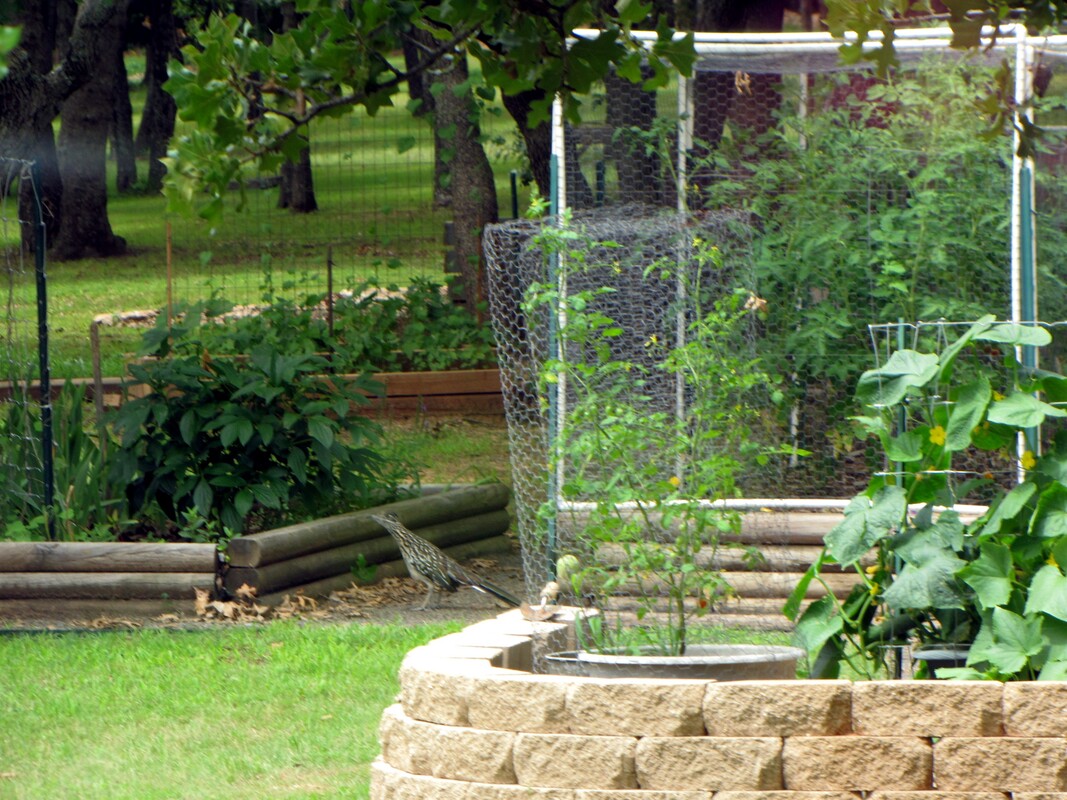
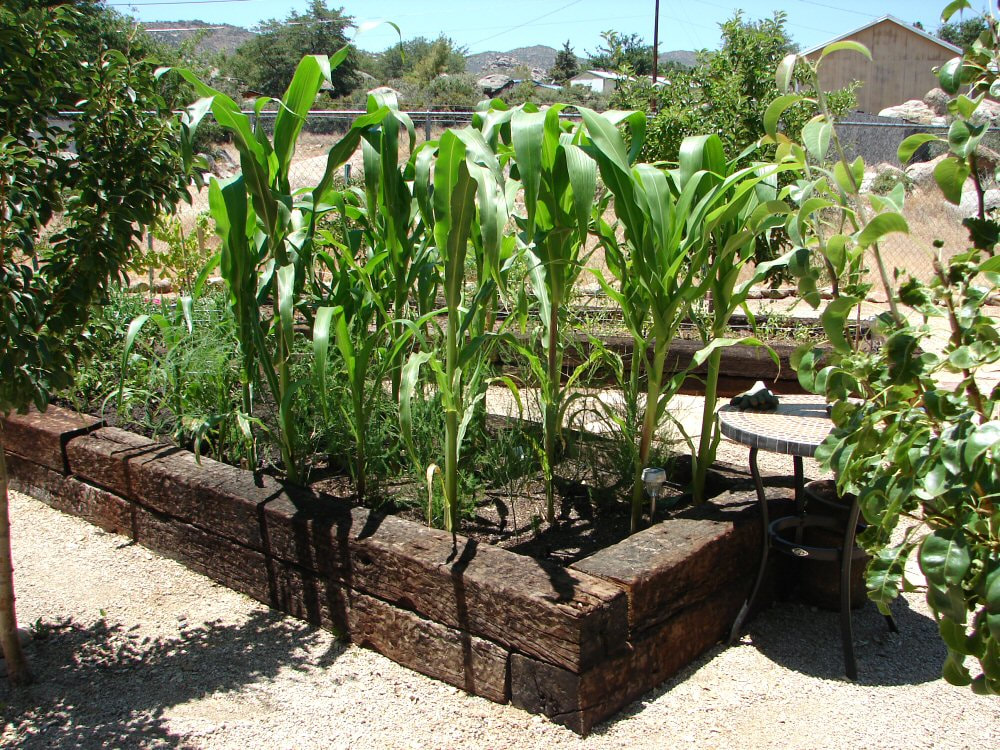
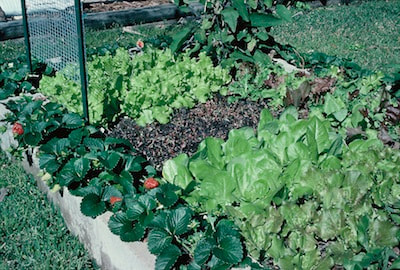
Make the most of your zucchini harvest this summer! Remember it’s good for you and so versatile! by Judy Kautz, OSU Extension Master GardenerDid you know that one half of households in the United States now grow vegetables? Oklahomans are no exception, and each spring we look with anticipation at all the plants and seeds that are available in our local garden centers. There is nothing that tastes better than a fresh vegetable picked from your own garden and eaten on the spot! Successful gardening, whether flowers, vegetables or trees, depends on good preparation, and the first step to growing delicious veggies is to test your soil. A healthy vegetable garden requires well-drained, loamy soil that contains plenty of nutrients. Testing your soil will tell you what nutrients it has. Soil tests can be obtained from your local Cooperative Extension Office, and cost only $10. They will provide you with an analysis of how much nitrogen, phosphorus and potassium your soil contains and whether it is acidic or alkaline, its pH. This is important information to have as you prepare your garden beds. To prepare a soil sample to take to the Cooperative Extension Center, get a clean bucket or pail. Using a spade or shovel, dig from the surface to about six inches and take several samples, about 12 – 16, around the area you want to test. Mix these samples together in your bucket and then put about 3 cups of this soil in a clean container. A clean plastic bag works great. Take your bag of soil to the extension center with your $10. They will send your sample to the Soil Testing Laboratory at OSU, and the results will be mailed to you in approximately two weeks. In those results, they will make recommendations on the amounts of fertilizer to use and any other soil amendments you need to add. Here are raised bed examples using landscape timbers and edging stones. If you don’t want to test your soil or garden in a bed in your yard, raised beds are a great alternative. In a raised bed, you can control the soil structure, pH and fertilizer nutrient levels. They are great for areas with poorly drained or tight clay soil, because you can add soil purchased or composted and create a great environment in which to grow your veggies. Other benefits are that you can grow vegetables in a smaller space, and it is easier to water and harvest raised beds. There are many materials that can be used for a raised bed; redwood, cedar, vinyl, and composites are all good options. Stone, concrete or landscape blocks also make great borders for raised beds, as do bricks. Landscape timbers and old railroad ties will work; if you use railroad ties, make sure they are not oozing black creosote or smell intensely. A group of half barrels is also great, especially for a patio! You could even use a child’s swimming pool, provided you poke holes in it to allow for drainage. Make sure you have a minimum depth of 8 inches of soil, but 10-12 inches is better. You can fill your bed with packaged garden soil or buy garden-ready soil in bulk from one of your local merchants. Take care when choosing a location for your raised bed; make sure your bed gets at least 6-8 hours of sunshine a day. Locating the bed close to a water source is a must, especially for our hot summers here in Oklahoma. Do not place your bed underneath a tree within its root zone, the spread of the branches. Tree roots will compete with your vegetables or plants for nutrients and moisture. Railroad ties work for raised beds as long as they are not infused with creosote or other materials. Preparation of your beds before the growing season is full upon us will ensure you have the best environment to produce the kinds of crops you want. What varieties you choose make a big difference, since you want to grow plants that are best suited to Oklahoma. In upcoming weeks we’ll discuss varieties of vegetables you can grow in Oklahoma! To see many examples of raised beds for all kinds of plants, visit the Master Gardener Demonstration Gardens at the Cleveland County Fairgrounds, southwest corner adjacent to the gravel parking lot. And for more ideas about gardening and to obtain top quality plants, be sure to attend the Spring Garden Party on April 16 in the demonstration gardens. We will offer how-to classes, activities for kids and the best plants to purchase for your gardens. Also, remember that you can call the County Extension office with questions or submit them online at the Cleveland County Master Gardener website at clevelandcountymastergardeners.org. Concrete blocks also make great raised beds!
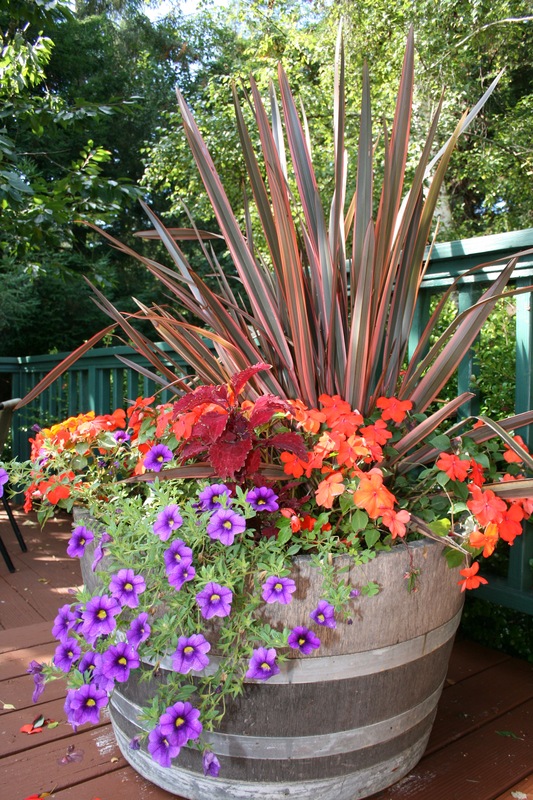
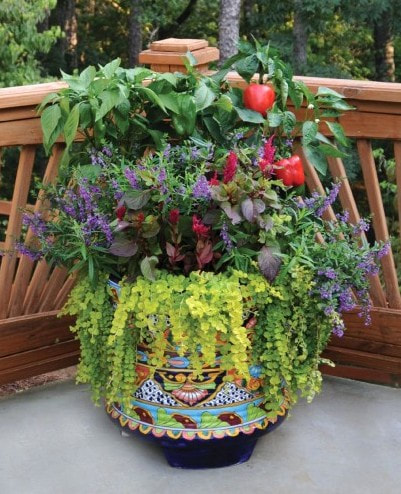
by Judy Kautz, OSU Extension Master GardenerMother Nature is all over the map with our weather this year! However, there is a solution for any type of weather we encounter – container gardening! Containers are great for flowers or vegetables; they are versatile, colorful, and have great utility, and best of all, they can be moved inside or under cover if we expect bad weather. In short, they are a perfect all-weather solution! Containers are ideal for any environment; they can adorn patios, porches, sidewalks, decks, and balconies. They are portable and can be moved to follow the sun or shade, depending on the plant requirements. Containers can avoid soil, insect and fertilization problems, and they can add a spot of color to any area where you want a lift, or provide delicious herbs or vegetables for your recipes. They are ideal if you love plants and gardening. There are many types of containers available – clay, plastic, metal, ceramic, wood, fiberglass – all are good choices; just adjust watering and fertilizer to suit what type you use. You can use anything you have available…an old wheelbarrow, or even a pair of cowboy boots! Make sure there are drain holes in the bottom, because good drainage is essential. You can put a coffee filter over the drain holes to prevent the soil from spilling. Size is important because you need to make sure there is enough room for the types of plants you use – at least 16 inches in diameter is ideal. Additionally, you should allow at least 6 – 8 inches of depth, again depending on the plant size. You can use all sorts of items as planters, even a pair of cowboy boots! Soil is important, and any good lightweight soil mix designed for potting is preferable – just look for the words “potting soil” on the label. Do not use soil from the garden or yard, as it is too heavy to work in containers. Fill your container with damp soil mix to within 1 to 2 inches from the top; soil should be moist, but not dripping wet. You can plant seeds or transplants from your local garden center, and most any plant, flower or vegetable, can grow in a container. Be sure to loosen the roots a bit to stimulate them to grow into the soil. Arranging plants in your containers depends on whether you are creating a flower arrangement or growing vegetables. A general rule of thumb for flowers is to use “thrillers, fillers and spillers”. Start with something tall or spiky, like grass or tall flower - this is your thriller - and place it in the center of the container, or towards the back. Next, add mass with a plant that has a round, full shape – this is your filler. Finally, soften the edges with a trailing or cascading plant that will spill over the edge of your container – this is your spiller. Choose a combination of complementing colors or textures, and choose plants that you like! This combination will provide you with an attractive and interesting container. Here is a container with the cordyline as thriller, orange impatiens and coleus as fillers, and super bells as spillers, all which make a lovely decoration on your patio. It is perfectly acceptable to grow your vegetables in pots, too, and sometimes, this is a better solution, especially if you don’t have much room in your yard. A container with vegetables like tomatoes, peppers or squash that is placed in a sunny spot on your patio or deck can produce a wonderful crop of tasty vegetables if you give them water and fertilizer. Make sure you have enough depth and width in your container to handle your chosen vegetables, and be sure to feed often. You will also need to water your containers more often than your garden beds, usually every two or three days, and more often when it is very hot. Fertilize your containers frequently, usually every two or three weeks, as containers need more nutrients since there is limited soil and increased watering. Use either water-soluble or slow release fertilizer – both are good – or combine the two types. Combine several pots in one area for a very attractive display, or group your plants by color or size. If bad weather is expected, you can easily move your containers to a more sheltered area to protect them from the elements. Containers are indeed the perfect all-weather solution! This container is also a mix of veggies and flowers, for an attractive display that is also tasty!
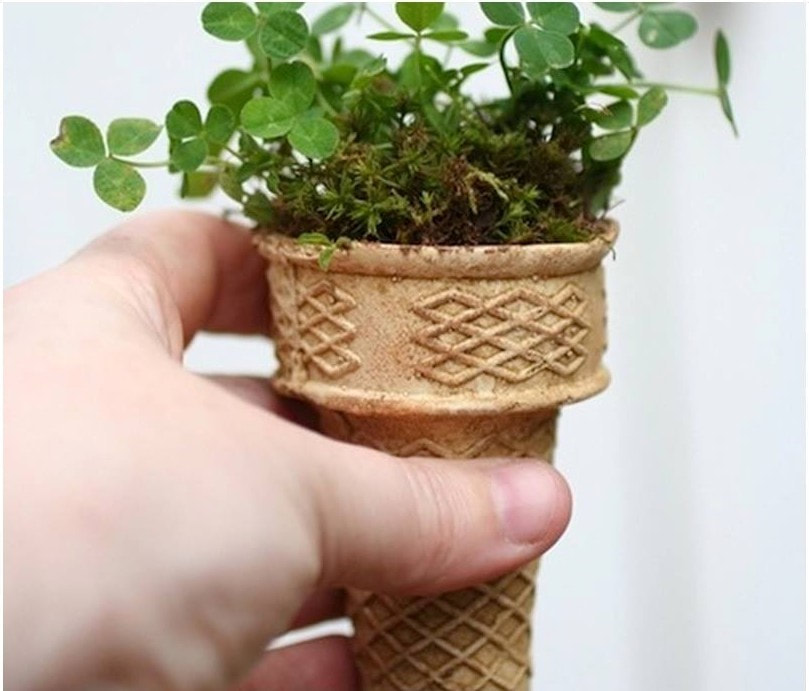
by Judy Kautz, OSU Extension Master GardenerWouldn’t it be great to have earlier harvests for our favorite summer vegetables? Recent research has proven that our winters may be getting warmer by a degree or two, but that isn’t going to help much with creating earlier harvests. However, there are a number of techniques you can employ to enjoy home-grown vegetables earlier this summer. First, select early-maturing varieties for your vegetables; seed companies advertise many options for shorter maturity times for almost every type of vegetable. Look for those that mature at least 10 days earlier than the normal varieties. ‘Sweet Zuke’ or ‘Sure Thing’ are zucchini varieties that mature early, for example; earlier yellow squash varieties like ‘Early Summer Crookneck’ and ‘Early Prolific Straightneck’ not only produce harvests earlier, but also have many other good traits. Most seed companies and nurseries offer similar choices for most vegetables. 'Sweet Zuke' is a variety of zucchini that will produce an earlier harvest. 'Early Summer Crookneck' provides wonderful yellow squash. Another technique to use for early harvest is to plant as early as possible; watch forecasts and check the Mesonet (www.mesonet.org) for soil temperatures in Oklahoma. Watch the weekly forecast, and if you have already planted and cold temperatures are predicted, cover your tender seedlings with plastic or milk jugs, for example, to protect them. You can also warm the soil in your beds using black plastic mulch; although this is not a preferred mulch variety because it is not natural, it is still very effective for warming the soil. About two weeks before planting, spread the mulch over your bed, making sure the black surface is as exposed to the sun as much as possible. When you are ready to plant, simply cut a circle in the plastic and insert your seedlings. Another option for earlier harvests is to start your plants indoors. Although some varieties are not recommended for transplanting, it is still possible for some varieties; for instance, using peat pots or pots of material that will be absorbed into the soil will offer little disturbance to them when you set them outside. It also helps to give your seedlings as much sunlight as possible, or to use a shop light or florescent desk light over them to aid their growth. Be sure to provide seedlings with a good plant food so they will keep growing until it is time to set them out in the garden. Here’s a fun idea for starting seeds early, and it would be a fun project for your children or grandchildren, to get them involved in gardening. Purchase some ice cream cones, the regular cup variety, and not sugar cones. Place seed starting mix or potting soil in each cone and plant your seeds just as you would do in a peat pot. Once your seedlings are ready to transplant, just put the entire cone in the ground. It will disintegrate and you will be left with a healthy plant to nourish in your garden. What fun! Start your seeds in ice cream cones for a biodegradable way to plant without disturbing tender transplants. When you are ready to transplant your seedlings outdoors, it is important to allow them to become accustomed to the change in environment. Gradually expose them to the outside over a period of three days or so, increasing their exposure each day. Also, be careful not to damage the young, tender seedlings when you handle them. Place them at the same level they were growing in your pots; water and feed them again as well. Avoid planting your tender seedlings on windy days...late afternoon is a good time to plant.
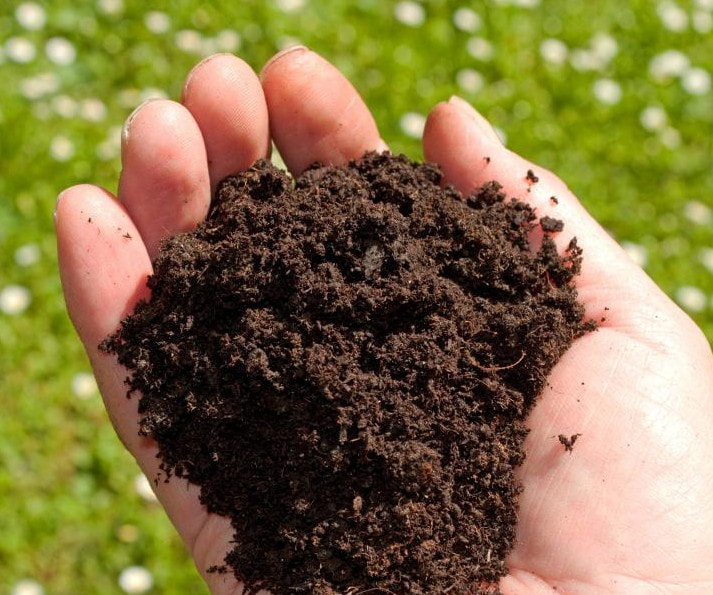
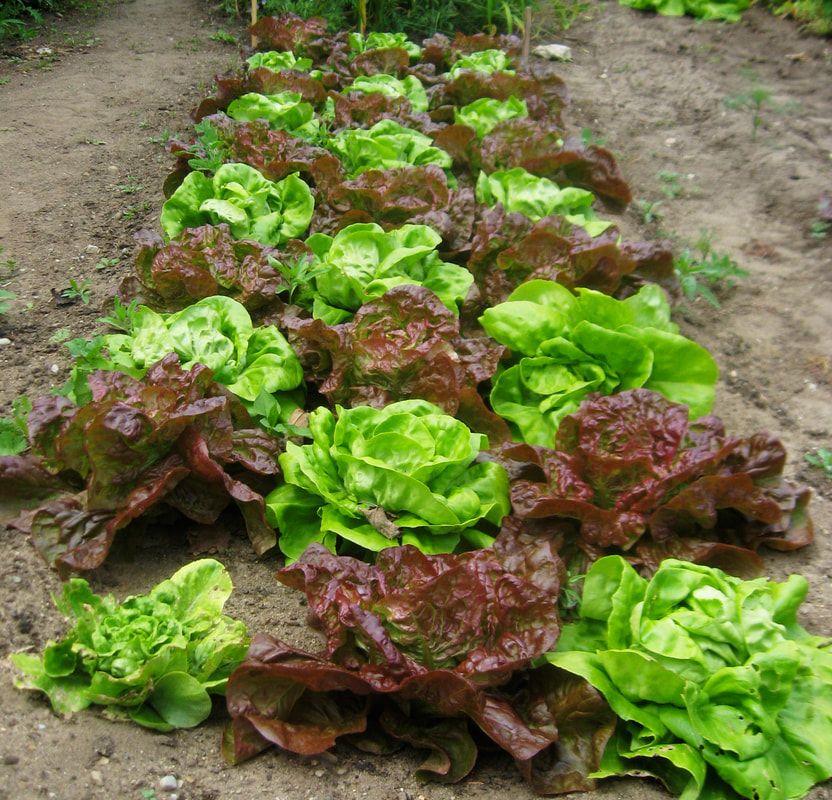
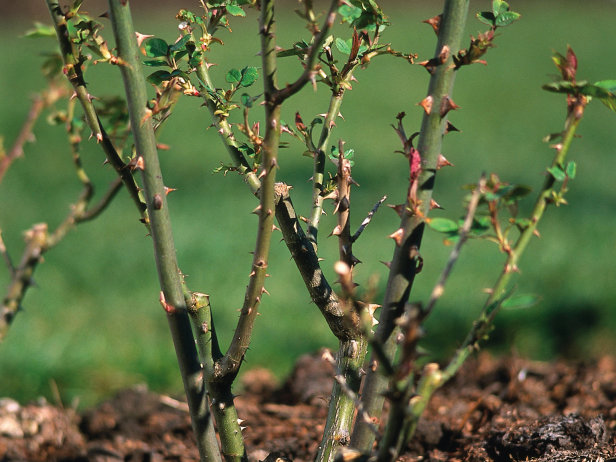
If you follow the steps listed above, you can have earlier harvests, and don’t we all look forward to those wonderful, tasty veggies right from the garden! by Judy Kautz, OSU Extension Master GardenerSpring brings warm weather, daffodils and the promise of tasty veggies and fruits from our gardens. However, it also brings a collection of tasks we should complete as we prepare for summer’s bounty of flowers and food harvest. Here are some items that should be completed as we anticipate the upcoming gardening season. First, check your soil. Before you start digging, take a handful of soil and squeeze it; if it forms a sticky ball, your soil is too wet to work. If it crumbles, it is ready to till. Working your soil too soon can create hard clods that may remain all season. It is also a good idea to have your soil tested to see if it needs added nutrients. Your local extension center will test your soil for $10 and you should have the results in about 2 weeks. Simply gather soil randomly throughout your yard in a clean bucket; you will need about 2 cups. Place it in a Ziploc baggie and take it to your extension center, fill out a short info sheet that marks the soil as yours, and send it off. The results will tell you how much phosphorus, potassium and nitrogen you have and it will also tell you the pH, how acidic or alkaline it is. Your extension agent will discuss those results with you and make recommendations on what you might need to add in order to obtain the best soil for your garden. Crumbly soil that is not too wet is perfect for digging and tilling. If you like cool-weather crops like lettuces, radishes, spinach and beets, now is the time to plant them as they prefer cooler temperatures. Sow your seeds directly in your garden as soon as our nighttime temperatures remain above freezing. The date of expected last frost is April 1st in our area, but remember that two years ago, we had a freeze on April 24th! Now is the time to plant cool season crops like lettuce and radishes, as they prefer the cooler temperatures of spring. Now is also the time to prune roses, while most plants are still dormant. However, our recent warmer temperatures these past weeks will certainly change that and encourage new growth. Remove dead branches and trim away crossed branches as well. You can safely cut back the green stems by at least one third, and even more if you really want to stimulate new growth. You can now trim your shrubs like crape myrtles, too, but make sure you do not prune bushes that bloom on old wood. Hydrangeas and lilacs fall in this category, so avoid pruning them until after they bloom. It is safe to prune your roses down by one third to one half their size to encourage spring growth. If you want to change your landscaping, now is the time to transplant deciduous trees (those that lose their leaves in winter) and shrubs while they are dormant. Dig a large root ball and plant in a more desirable spot at the same depth as your tree or shrub grew before. Water deeply every few days for the first season. If you have purchased new shrubs and trees, this is the ideal time to plant them too. This is a perfect time to feed your perennials and roses. Use any balanced commercial fertilizer or compost around your plants and gently work it into the top layer of the soil. Be sure to follow the instructions on the label. If you have ornamental grasses in your yard, shear them back now – Miscanthus, feather reedgrass, switchgrass, fescue and little bluestream all should be trimmed before new growth begins to emerge. This is also a good time to divide clumps if they’ve become too large or the centers have died out.
Spring holds the promise of new beginnings and new life for our gardens. It is a wonderful time of the year to shed those winter doldrums and prepare for the upcoming growing season! One final note: while you are deciding what to plant in your garden, mark your calendars for Apr 16th, the annual Garden and Plant Party at the Demonstration Gardens of the Cleveland County Master Gardeners. The gardens are located at the Cleveland County Fairgrounds, 601 E Robinson, Norman, just west of the gravel parking lot. Join us for the plant sale and a day of activities, especially for children, from 9 am to 1:00 pm. We have lots of plants just waiting for you in our greenhouse! |
Welcome to Dishing the Garden Dirt!
|

 RSS Feed