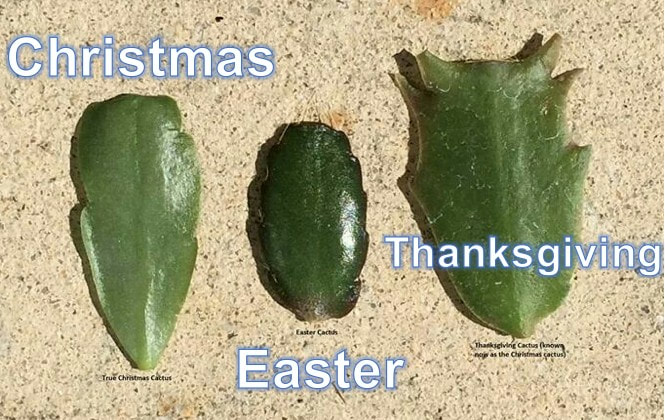
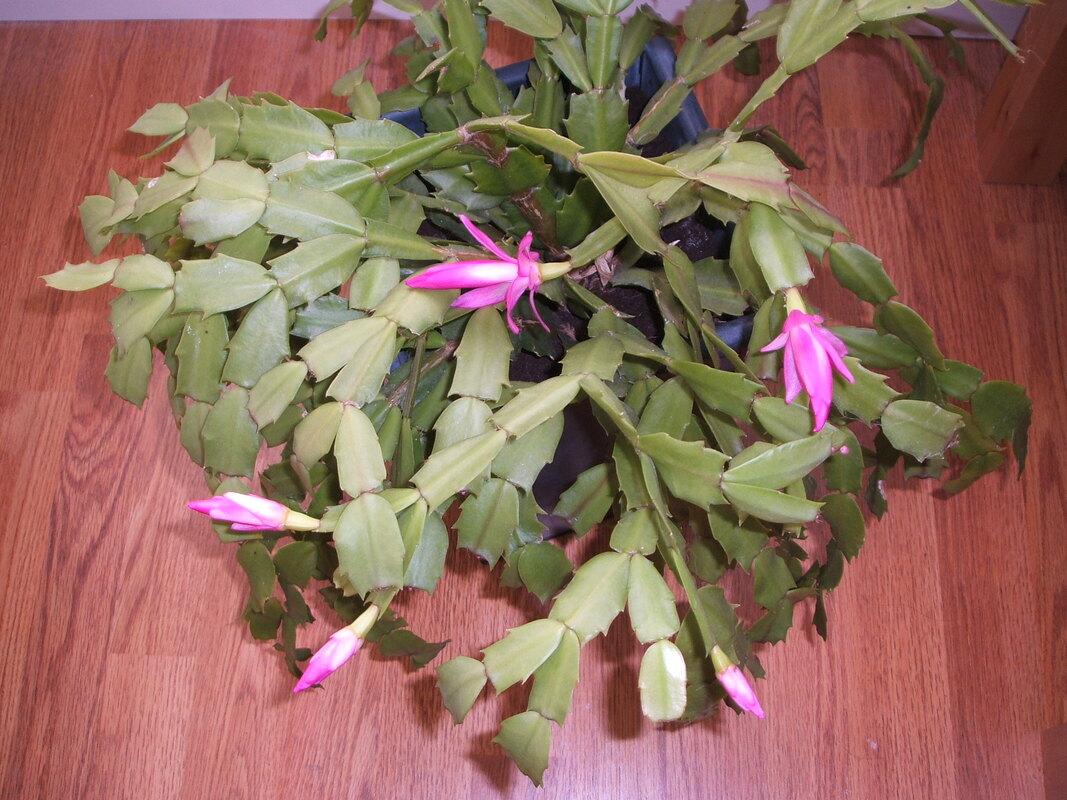
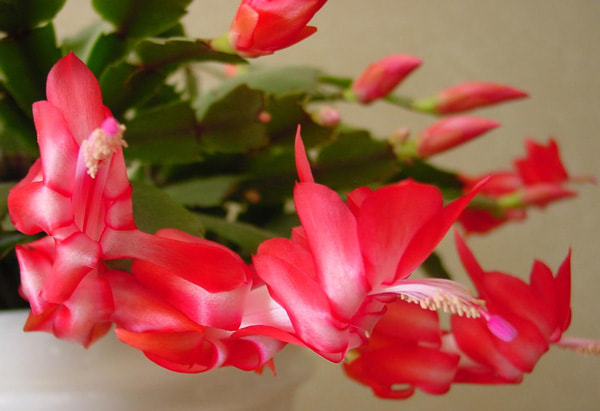
by Judy Kautz, OSU Extension Master GardenerHave you see holiday cactus for sale in stores this season? This is the time of year when they become readily available. One of the most popular houseplants, Christmas cactus is a great way to add a burst of color indoors during dreary winter months. If poinsettias and amaryllis are not your cup of tea for holiday blooms, why not try a holiday cactus? These plants are known for their colorful tubular flowers and ease of care, and they are readily available in our area. They make wonderful houseplants or summer garden plants, and they are a perfect holiday gift for that hard-to-buy-for person. There are actually three types of holiday cacti (see photo): the Christmas cactus has flattened leaves with rounded teeth on the margins; the Thanksgiving cactus has pointed teeth, and Easter cactus has pointed teeth with fibrous hairs in the leaf joints. Interestingly, under normal conditions holiday cactus will bloom close to the holiday of its name, but these plants can be forced to bloom at other times. And to make things a little more confusing, most of the Christmas cactus sold are actually Thanksgiving cactus, and they will bloom in subsequent years at Thanksgiving time! This photo helps you easily identify the three different types of cactus that are available. Holiday cacti are really very easy to care for and will flourish in most homes. When the plants are in flower, they should be kept in bright, indirect light, because too much light will cause the flower to fade, or the heat may cause the flower buds to drop. Ideal temperatures are 70 degrees during the day and 60-65 degrees at night. Be sure to water your cactus thoroughly, and let the plant dry only slightly between watering. Even though they are called cactus, they are not as drought-tolerant as their cactus name suggests. The leaves will wrinkle if the soil is dry, and during flowering, letting them dry too much will cause the flower buds to drop. Once the flowers fade, you may continue to grow your cactus as a house plant. Soil should be well drained, and a fertilizer should be applied monthly between April and October using a complete houseplant fertilizer. To encourage branching and more flowers, prune your plant in June; just remove a few sections of each stem with your fingers or a sharp knife. An added benefit is that the removed pieces can easily be rooted in moist vermiculite to make more plants! This is a Thanksgiving cactus with points on its leaves, and pink is a very common color for this variety. Holiday cacti flourish if placed in a shady spot in your garden during the summer, until the temperatures get below 45 degrees. The naturally longer nights and cool temperatures in late summer also encourage flower development. Getting them to flower, though, requires some understanding of the plant itself. Holiday cacti are short day plants, which means they bloom when nights are at least 15 hours long. They will also flower if they are exposed to prolonged cool temperatures between 50-55 degrees. No flowers will form in night temperatures above 70 degrees. Holiday cacti grow and flower best when the roots are a little cramped, so they do not need to be repotted annually. Repotting is only necessary when the soil becomes compacted or the plants have completely outgrown their containers. The best time to repot holiday cacti is spring or early summer (when the plants are no longer blooming). Here is information about regular maintenance for your cactus. A Christmas cactus loves being pot-bound, and you only need to repot it every two years, at most. However, you may have to replace the soil more often that you need to change pots. The only other regular maintenance you need to do is pruning. The plant can get rather leggy, and its branches will start to drop because it couldn’t support its weight. As such, you can prune away or cut off a piece to propagate. Moreover, after blooming, simply pinch off the ends of the plant’s stems to encourage branching. Holiday cacti are available locally in most garden centers; they are a great alternative to bring color into your home during the drab days of winter! The beautiful red color of this holiday cactus is perfect for Christmas.
0 Comments
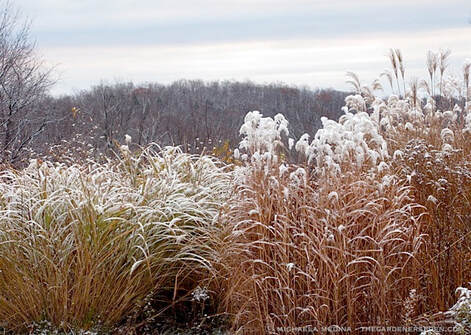
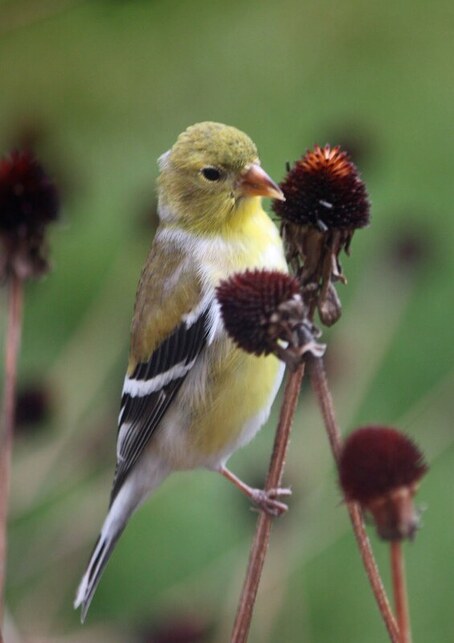
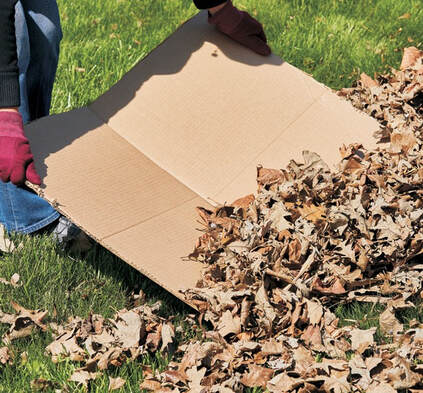
by Judy Kautz, OSU Extension Master GardenerWe’ve had our first freeze and now we have a decision to make. As gardeners, we like to keep our yards cleaned up and cleared of debris, especially after our first frost and, especially after plants have turned brown and shriveled. But, is it better to wait until spring to clean up the yard or do it now? There are a number of good reasons to let the debris remain until spring. First, if you have perennials that are evergreen, do not cut them; leaving them adds extra nutrition they get through their leaves. Also, plants like sedum, even though their blooms are spent, offer winter interest to your garden, especially if we have a dusting of snow. Winter grasses can look lovely after a heavy morning frost. Ornamental grasses are best left through the winter as they provide interest in the garden. Foliage left on your plants also provides natural protection from the winter cold; stems and crowns of plants can catch blowing leaves, which can add more insulation. Additionally, plants with hollow stems like salvia, are unusual; if the stems are cut, winter moisture can make its way to the crown, damaging the plant or even killing it. If you want to save time and energy, wait until spring to remove withered leaves on plants like daylilies. It is much easier to apply a gentle tug to remove leaves instead of using pruners! However, iris plants do benefit from giving their leaves a trim in the fall; simply cut the leaves in a fan shape, leaving about 4-6 inches on the leaves. If you are a bird or wildlife lover, then leaving spent plants through the winter provides great benefit to these creatures. Birds love the seeds from Black-eyed Susans, coneflowers and ornamental grasses. The finches, particularly, have enjoyed the buffet in my yard provided by the standing phlox seed heads this year. Grasses and plant debris also offer shelter to birds and small critters as the weather turns colder. Finches love to feast on the seedheads of the black-eyed Susan in winter. Now that we’ve talked about why you should wait until spring to tend your spent perennials, there are still some very good reasons to do some fall clean-up. Disease prevention is the best reason; be sure to discard rather than compost any plant material suspected of being infested by disease or insect pests. Plants like bearded iris can harbor iris borers and fungal disease if they are not pruned up before winter. If you want to remove leaves, make quick work of a yard full of leaves with a sturdy piece of cardboard. Using it like a snow shovel, push a wide swath of new fallen leaves into piles. Do a fast pass across the lawn every day or two before leaves pack down or get rained on to keep them all together until you have a chance to move them to the compost pile. Cardboard used like a shovel works great to gather up leaves in your yard until you can get them to compost pile. If you don’t want plants that self-sow like coneflower, blanket flower, black-eyed Susan, or globe thistle to reseed, be sure to cut them back in the fall before their seed heads mature. Keep in mind, however, that these very same plants have seeds that attract birds to your yard. If you enjoy bird watching in your yard in the winter, save this task until spring!
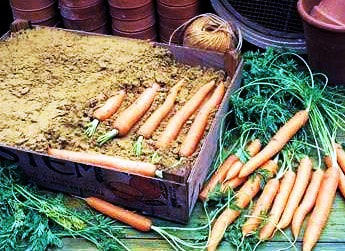
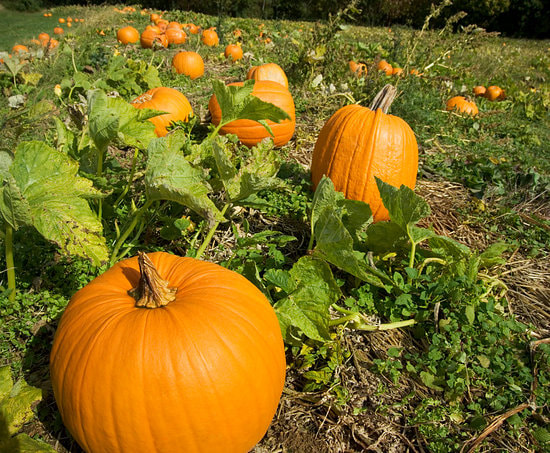
Unattractive foliage is probably one of the most compelling reasons to clean up your plant debris in the fall. Who wants to look at black or slimy leaves after a frost? There are some plants that are particularly bad for this: ligularia and Japanese anemones are some of the worst offenders, so prune up or remove this type of foliage. For a gardener, there is always something that can be done in your yard; all our landscapes need some work in the fall and in the spring, because a gardener’s work is never done! by Judy Kautz, OSU Extension Master GardenerOur first hard freeze is imminent, and now is the time to harvest your remaining produce before our lows dip down to really freezing temperatures. Even though we have had a light frost, you can still harvest your veggies to enjoy later this winter. Here’s how to store these vegetables so you can enjoy them into the winter. Fall-planted carrots are some of the easiest vegetables to store; wash roots, trim the tops to ½ inch and place in perforated bags. These veggies can be stored in a refrigerator, cold garage or pit for 2-4 months. A box works well for storage; simply layer carrots in sand or soil and place in a cool garage. You may also overwinter your carrots in the ground if you cover them with a heavy layer of mulch. Winter or black radishes may be stored the same way as carrots. Other radishes should be washed and trimmed, top and bottom, and stored in plastic bags in the refrigerator; they will keep up to one month. Carrots can be stored in a box with soil or sand so they can be used well after harvest. Winter squash and pumpkins should be stored with part of the stem attached. These vegetables can be placed on shelves in a single layer so air can circulate around them; they will keep for several weeks. Of course, pumpkins are among our favorite decorations for Halloween and Thanksgiving, and they make great pies and soup as well. Pumpkins should be stored with part of the stem still attached and will keep for several weeks. Onions are another vegetable that keeps well long after harvest; you should remove tops and then place onions in shallow boxes or mesh bags. They really should be cured in a garage or barn for 3 to 4 weeks before using. Onions will keep for several months if they remain dry. This was a banner year for green peppers! The recent rain we had in the fall coupled with our cold snap in mid October resulted in a bumper crop of green and jalapeno peppers. Your peppers can be stored in plastic bags at 40 degrees for at least 2-3 weeks. Peppers also freeze well; you can dice or slice them, blanch them in boiling water for four minutes, and freeze them in plastic bags. These frozen peppers work great in sauces, spaghetti, fajitas, etc. – anywhere you use cooked peppers. If you want to use them in salads, do not blanch; just dice them and place in plastic bags right in the freezer. If you have green peppers that are medium to large sizes, stuffed peppers are a perfect way to prepare a delicious meal for your family and use those extra peppers. Here is my husband Ron’s favorite stuffed pepper recipe: brown 1 ½ pounds of ground beef with 1 cup chopped onion. Add 1 can whole kernel corn, ½ cup instant brown rice, 1 tablespoon Worcestershire sauce, 1 can garlic and onion flavored diced tomatoes and ½ teaspoon salt. Stir and simmer for 15 minutes. In the meantime, cut the tops off 6 – 8 green peppers and remove seeds and excess membrane. Sprinkle inside of peppers with garlic salt and place upright in baking pan. Stir 1 cup shredded cheese into meat mixture and spoon into peppers. Bake at 350 degrees for 1 hour. Serve with Texas toast or garlic bread for a yummy and satisfying meal. If you have many, many peppers, you can also freeze your stuffed peppers; when ready to serve, thaw, cut each pepper in half and cook in microwave for 3 minutes. They may be a bit juicy, but extra juice can easily be absorbed by a paper towel. They are a great quick meal for busy evenings. With proper storage, you can enjoy your vegetable harvest for many weeks to come! Stuffed peppers are a great way to use green peppers harvested before our recent frost.
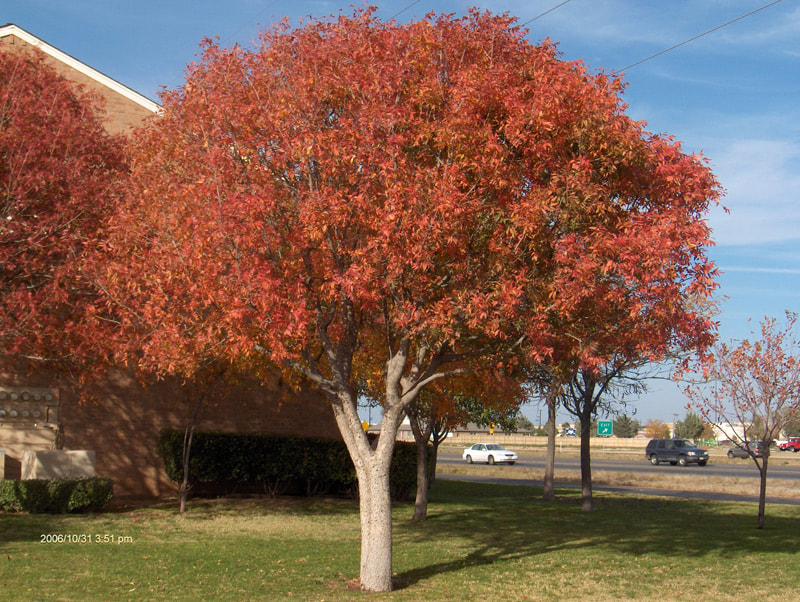
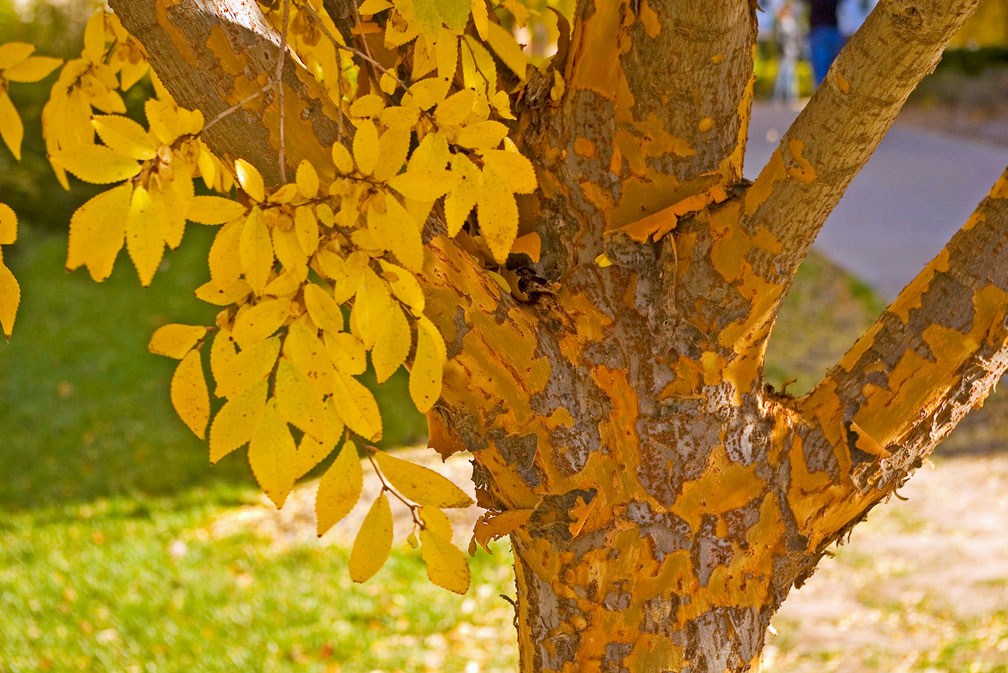
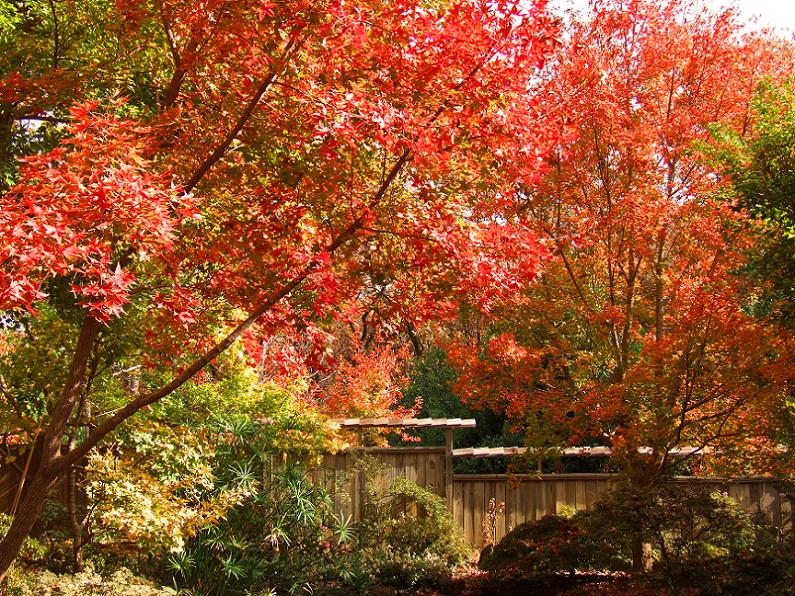
by Judy Kautz, OSU Extension Master GardenerMany of us have lost many trees in our landscape during our recent drought and hot weather, but there can be a silver lining. If you have the need to replace trees, consider adding trees that have beautiful foliage in the fall. Although we do not enjoy as brilliant the foliage of hardwood trees as they do in the Northeast, there are still many trees that we can grow here that will beautify our yards with autumn colors. Local nurseries and garden centers have been having sales, with many trees featured at reduced prices. This is the perfect time to consider planting new trees in your yard to bring you lovely fall foliage next year. Let’s look at some perfect varieties for Oklahoma. A favorite tree which sports orange-red fall color is the Chinese Pistache; at maturity, it can get as large as 25-35 feet, and its foliage is relatively pest free. The female tree has attractive red or blue fruit, and this tree has a medium growth rate. It becomes more rounded as it grows, and is hardy throughout Oklahoma (zones 6-9.) It is readily available in our area. Chinese Pistache tree is well-suited to Oklahoma with beautiful red foliage. If you like yellow fall color, consider the Lacebark Elm; it grows 40-60 feet at maturity, and has glossy leaves and attractive red fruit. Another unique feature of the Lacebark Elm is its exceptional brownish-orange mottled bark, which adds viewing interest. If it is irrigated and fertilized, this tree will grow very fast, becoming rounded at maturity, and is also hardy throughout Oklahoma. Additionally, it is an excellent disease-free substitute for the American elm. Lacebark Elm has not only lovely yellow foliage, but very interesting bark as well. Another tree which grows well here in Oklahoma is the Bald Cypress; growing from 50-80 feet at maturity, its fern-like foliage will turn reddish-brown in the fall. An added benefit of this tree is that it is drought tolerant, with a medium to fast growth rate. It is pyramidal in shape at maturity and has attractive, rounded fruit. This tree is hardy throughout Oklahoma and readily available locally. Maples are known for their beautiful fall color, and there are many varieties that do well here in Oklahoma. These trees are generally smaller in size, about 15-20 feet, so may be better if you have a small area. They have shiny, three-lobed leaves and some varieties have attractive red fruit as well. They are quite adaptable to many conditions, pest free and hardy throughout Oklahoma. Ask your local nursery or garden center for varieties that have red fall color. Shantung Maple is one of the many varieties of maples which provide brilliant foliage in fall. Once you have decided which trees you want, how do you plant them? First, dig a hole 2-3 times the diameter of the tree’s root ball; don’t dig too deep, as the tree should be planted at the same or slightly above the original grade of the ball. Be sure to cut any rope tied around the tree, designed to keep the burlap covering the root ball, as it will cut into the tree as it grows; it is okay, however, to leave the burlap in place on the root ball. Place the tree in the hole and fill with native soil; tamp lightly and do not over-fertilize newly planted trees. It is a good idea to stake a young tree if it is top-heavy or in a windy area, but remove the stakes after the first season.
Keep a 5-6 foot circle weed- and grass-free around the tree, and place 1-3 inches of organic mulch in this circle. Water at least 1 inch weekly, and continue to water throughout the winter. It is also a good idea to wrap the tree as winter approaches to protect the young, tender bark from rodent damage and temperature fluctuations. Your tree may also benefit from wrapping for the first couple of summers to protect it from sunscald. Planting new trees this year will give you fall color next year! Now is the perfect time to add beauty to your yard! |
Welcome to Dishing the Garden Dirt!
|

 RSS Feed